Wednesday, February 8, 2012

Update: Wheat Free Gluten Free Peanut Butter Cookies

These are SO easy to make.  My daughter loves to make them with me!


Mix 1 cup of smooth peanut butter, 1 cup of sugar or sugar substitute, 1 teaspoon of baking powder and 1 egg.  Blend well by hand.  Use your hands to make small balls of the sticky dough, and roll each ball in sugar before placing it on your baking sheet.  (I line mine with parchment paper first.)  After the balls are arranged on your baking sheet, use a fork to press criss-cross designs on the top of each cookie.

Bake at 350 degrees for about 8-10 minutes, depending on how crisp or golden brown you want the cookies.  Cool.  EAT!!

Friday, August 26, 2011

Gluten-Free Flourless Peanut Butter Cookies

A friend posted this recipe on the Facebook Global Gluten Free Group, and I practically ran to the kitchen to make them because they looked so easy and delicious.


Ingredients:

1 cup of GF peanut butter
1 cup of sugar
1 egg

Instructions:
  1. Stir to mix the ingredients.
  2. Drop by spoonfuls on a cookie sheet lined with parchment paper.
  3. Bake at 350 degrees F. for 8 minutes.
  4. Cool for 10 minutes on top of the oven before moving to a plate.

Monday, August 22, 2011

Gluten Free Stuffed Pasta

I am developing a sense of peace and determination when it comes to adapting recipes to fit my gluten free lifestyle.  Normally, my diet is very basic.  I tend to love certain foods, so I eat them over and over.  Occasionally, I like to spice it up and consider a food that we gluten-free-foodies don't have an opportunity to enjoy that gluten-eaters have at their fingertips.

I am currently obsessed with reading cookbooks, magazines and websites in an effort to learn the tricks to be a better GF cook.  So, I was thrilled when I found a recipe for stuffed pasta at 
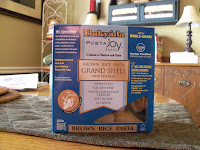
http://allrecipes.com/recipe/stuffed-pasta-shells/detail.aspx.  Yay!  It wasn't difficult to find these babies online:


The original recipe called for 12 oz. of cooked pasta.  That was too much. 8 oz. of pasta would have been plenty is you're using this brand.  The recipe online also called for a jar of spaghetti sauce.  We love my homemade sauce, so I made that change, too.  Finally, my daughter is not a fan of spinach, so I did use some, but probably only about 1/2 cup instead of the whole box.  Following is my gluten-free version of the recipe:

Pasta Shell Ingredients:

One 8-oz. box of Tinkiyada brown rice pasta Grand Shells
One 15-oz. container of ricotta cheese
Four cups of Mozzarella cheese
Frozen spinach to taste, thawed

Sauce Ingredients:

One pound of ground beef, chicken, turkey or pork
Three cloves of garlic
1/2 cup of chopped onion
Ground pepper
One large can of GF tomatoes with basil and garlic - Use the liquid, too.
One small can of GF tomato paste
One small can of GF tomato sauce
Three tablespoons of Italian seasoning
Three tablespoons of chopped fresh basil

Cooking Instructions:
  1. Brown ground meat with onions, garlic and pepper.  Drain.
  2. In a crockpot, add meat, all three kinds of tomatoes, seasoning and basil.  Sometimes I add about two good tablespoons of prepared basil pesto to the mixture.  Cook the sauce on low temperature for two-three hours.
  3. Combine the ricotta and mozzarella cheeses with the thawed spinach.  Set aside.
  4. Cook the pasta according to instructions.  Tinkyada recommends boiling pasta that is going into a casserole for two minutes less that you would for regular use, so I cook the large shell pasta for 17-18 minutes.  Drain the pasta and rinse it with cold water.
  5. Stuff the pasta shells with the cheese mixture.  Place them into a greased casserole dish.
  6. Use a ladle to spoon sauce over the shells. 
  7.  Bake at 350 degrees F for 25-30 minutes or until the cheese is soft and melted.
       

    Monday, May 23, 2011

    Gluten-Free Delicious Crock-Pot Stuffed Chicken Breasts

    My younger brother, when we were growing up, called chicken breasts "chicken boobies."  No matter how old I get, I always think of that when I cook chicken breasts. 

    I made stuffed chicken breasts for Easter dinner last month.  It was a brand new recipe, and I was so excited to try it and impress my husband and daughter with delicious holiday food.  It was terrible!!  So, I hunted and searched until I found this gem-recipe.  You can see the original recipe at http://allrecipes.com/Recipe/Bacon-and-Feta-Stuffed-Chicken-Breast/Detail.aspx.  It was without a doubt the best chicken I've cooked in a long, long while.  Plus, it was simple to prepare in ten minutes plus 3 hours of cooking time!


    Ingredients:

    3 boneless gluten-free, organic chicken breasts
    1/3 cup feta cheese or the cheese of your choice, crumbled or diced into very small pieces
    1/4 cup gluten-free bacon bits
    fresh basil or basil pesto (I used pesto with garlic and basil.)
    2 (14 1/2 oz.) cans gluten-free diced tomatoes (I used basil and oregano diced tomatoes.)

    Directions:
    1. Mix bacon and feta cheese together in a small bowl.  Set aside.
    2. Cut a 2-3 inch slit, lengthwise, in the side of each chicken breast to create a pocket into which you fill with the cheese mixture.  Secure closed using toothpicks as needed.
    3. First, place the chicken breasts in the bottom of a greased crock pot or slow cooker.  Sprinkle with salt and pepper; add tomatoes and basil.
    4. Cook on the High setting for about 2 1/2 - 3 hours or until the chicken is no longer pink and the internal temperature is 165 degrees. 

    Gluten-Free Peach Cobbler

    I haven't been a good blogger lately.  We've been a busy family, so I've been eating fruit and roasted vegetables - healthy and tasty - but not much to write about.  School is almost out (three more days), so we celebrated with a delicious dinner last night since it was our last weekend before summer.  Next weekend we'll have to celebrate the beginning of out summer vacation.  There is always something to celebrate!!

    I found this recipe online at http://www.livingwithout.com/recipes/gluten_free_dairy_free_egg_free_peach_cobbler-2505-1.html and will adapt it next time.  In my opinion, there was way too much crumby topping and not enough peachy filling.  The recipe below is my recommended adaptation of the original recipe with half the amount of crumb dough.  Enjoy!!


    Peach Cobbler

    Filling Ingredients:

    1 (29-oz.) can of sliced peaches in juice or heavy syrup
    2 teaspoons of lemon juice
    1/4 cup brown sugar
    1 T. Stevia in the Raw
    1/4 t. ground cinnamon
    1 pinch nutmeg
    1/2 t. pure vanilla extract
    1 1/2 t. tapioca flour (I get mine at a Chinese grocery store.)
    1. Drain the peaches, reserving all liquid into a bowl which you set aside.  Place the drained peaches into a heavy saucepan and add lemon juice; stir peaches and lemon juice well.
    2. Peach juice:  Add brown sugar, Stevia in the Raw, cinnamon, nutmeg, vanilla, and tapioca flour.  Whisk the juice mixture well to blend.
    3. Pour the juice mixture over the peaches in your saucepan.  Bring it to a boil, stirring constantly.  Then reduce heat to medium and cook about 1-2 minutes until the liquid thickens.  Set aside.
     
         4.  Preheat oven to 425 degrees F and lightly grease an 8x8 baking dish.

      Cobbler Crust Ingredients:

      1/2 cup brown rice flour
      1/4 cup tapioca flour
      1/4 cup coconut flour
      1/4 t. salt
      1 1/2 t. Stevia in the Raw
      1 1/2 t. sugar
      1 t. gluten-free double-acting baking powder
      2-3 T. butter or shortening (substitute if need dairy-free), diced
      1/2 cup canned coconut milk
      1/2 t. pure vanilla extract
      1/2 t. sugar, for sprinkling on top
      1/8 t. cinnamon, for sprinkling on top
      1. Mix flours, salt, Stevia in the Raw, sugar, and baking powder together with a whisk.
      2. Use a fork to cut butter or shortening into the dry ingredients until thoroughly mixed; reserve 1/4 to 1/2 cup of crumbs for later.
      3. Make a well in the remaining crumb mixture and add coconut milk and vanilla.  Blend with a fork until just combined.  Don't over-mix.
      4. Sprinkle the reserved 1/4 to 1/2 cup of crumb mixture in the bottom of your prepared baking dish.  Pour the hot peach mixture over the crumbs in the dish.  Drop tablespoons of dough mixture on top of the peach layer.  Press on the top layer lightly to be sure that the dough drops between the peaches.  Sprinkle the top with sugar and cinnamon.
      5. Bake on middle oven rack for 20-25 minutes or until golden brown.

        Sunday, April 3, 2011

        Penne with Arugula-Walnut Pesto

        We had a delicious meal last night for dinner!  First, I made the pesto and let it rest in the refrigerator while I made biscuits and then boiled the pasta while those were baking.  I've tried "homemade" biscuits, but we LOVE the Betty Crocker Gluten-Free Bisquick recipe!!  It is super simple, and the results are amazing.  I got two thumbs up from my adorable husband. That is always a good thing!

        12 oz. arugula with stems removed
        2 garlic cloves, cracked and peeled
        1/2 cup extra virgin olive oil
        1/2 cup walnut pieces, toasted
        1/4 teaspoon grated nutmeg
        Salt and pepper to taste
        1/2 cup Parmesan cheese, grated
        1 lb. gluten-free Penne pasta
        1. In a small saucepan, over medium heat, cook garlic cloves in olive oil for five minutes.  Remove from stove and set aside to cool slightly.
        2. Fill food processor with arugula (loosely packed).  Add walnuts, garlic, nutmeg, salt and pepper, and one-half of the warm oil.  Once lid is in place, pulse until you grind enough to get a smooth paste.  Stir in the remaining oil and Parmesan cheese.  Spoon the pesto into the bottom of a pasta serving bowl.
        3. Cook pasta according to product instructions.  Drain.  Pour cooked pasta over the pesto.  Add 1/2 ladle of pasta water, and stir pasta together with pesto.  Serve warm.
        Note:  Sometimes I add 1/2 cup of sauteed mushrooms to the pasta before tossing with pesto.

        Betty Crocker GF Bisquick Garlic Biscuits 
        http://www.bettycrocker.com/recipes/cheese-garlic-biscuits-gluten-free/781e1a42-c051-4ab9-bd5e-ac38c7588bc0?sr=2&st=7#/?term=gluten+free+biscuits&pi=1&mr=20

        2 cups gluten-free Bisquick
        1/4 teaspoon garlic powder
        2/3 cup cold milk
        1/4 cup cold butter
        1/2 cup shredded cheddar cheese
        3 eggs

        Garlic Butter Topping
        1/4 cup butter, melted
        1/4 teaspoon garlic powder

        1. Preheat oven to 425 degrees.  Mix Bisquik and 1/4 tsp. garlic powder, whisking together to blend.  Add  butter; use a pastry blender or strong fork to blend until mixed to crumb-stage.  Add milk and eggs; mix.  Add cheese; mix.  
        2. Drop by large spoonfuls onto an ungreased baking sheet.  (The original BC recipe says you'll get 10 biscuits, but I can easily get 12 biscuits from this recipe.)
        3. Bake for 10-12 minutes until golden brown.  While the biscuits are baking, melt the topping butter and mix with 1/4 tsp. garlic powder.  Brush the topping over the biscuits as soon as you take them from the oven.  Serve warm. 

        Favorite Smoothie Recipes

        Strawberry Banana #1
        1 cup milk
        1 cup water
        10-oz. frozen strawberries, partially thawed
        1 medium firm banana, cut into chunks
        1 tsp. gluten-free vanilla extract
        6 ice cubes

        Strawberry Banana #2
        2 medium ripe bananas
        1 can crushed pineapple, drained
        1 1/2 cups milk
        1/2 cup fresh or frozen strawberries
        2 tablespoons gluten-free organic honey
        5 ice cubes

        Peach Strawberry
        1 cup fresh strawberries
        1 cup fresh or frozen unsweetened sliced peaches
        1 cup gluten-free plain or vanilla yogurt
        1-2 tablespoons sugar
        Dash of cinnamon (sprinkle on top before serving)

        Peach Smoothie
        2 cups milk
        2 cups frozen unsweetened peaches
        1/4 cup orange juice
        2 tablespoons sugar
        5 ice cubes

        Combine all ingredients in a blender, and process until smooth. 

        Monday, March 28, 2011

        Honey Roasted Nuts


        I've been buying similar pecans by the can, and they were a but pricey.  So, when I found this recipe, I gave it a try.  The results were better than I anticipated.  Of course, I like to eat these on their own, but they're a delicious addition in salads or crumbled on peas or green beans.

        1/4 c. honey
        1/4 c. butter
        1 tsp. cinnamon, divided
        4 c. nut halves (walnuts or pecans)
        2 to 3 tbsp. sugar

        1. Preheat oven to 325°F.
        2. Line pan with foil and grease foil. In saucepan over medium heat, combine honey, butter and 1/2 teaspoon cinnamon. Bring to a boil. Cook 2 minutes, stirring constantly. 
        3. Put nuts into medium bowl. Pour honey mixture over nuts and stir until evenly coated. Spread on prepared foil-lined pan.  Bake 10 to 15 minutes or until nuts are glazed and lightly browned. Cool in pan for 20 minutes. Remove from pan.
        4. In medium bowl, combine sugar and remaining cinnamon. Toss with glazed nuts to coat.
        Makes 4 cups.

        Sunday, March 27, 2011

        Lies and Truths

        I was just now reading another Celiac's blog, and I enjoyed her humor-based reality.  I'm going attempt to share my personal lies and truths:


        1. Truth - I enjoy eating at the homes of my friends.  I do not expect my gluten-eating loved ones to prepare gluten-free food for me in their homes.  Food safety for people with super-sensitivities like mine is tricky.  It isn't a good idea to cook food for me in the same pan that was used to fry glutenous foods.  Drawers are known to get crumbs in them, and if I eat with a spoon or fork that kissed a crumb, I'll get sick.  Right away.  You don't want to know the details, but you'll see me dashing to the bathroom, holding my head and belly simultaneously and scratching my skin.  It's not a pretty sight.  So, please allow me to bring my own food.  I really don't mind!
        2. Lie - I am glad to have Celiac disease.  No!  No!  No!  My dear husband, when I found a long list of restaurants that specialize in gluten-free food in Atlanta - where we were headed for a vacation - gently accused me of being happy to have Celiac.  Yikes!  I am far from proud or delighted to be living the rest of my days on a strict gluten-free diet; I was, however, ecstatic to find that the Atlanta community embraces my particular situation and provides delicious, safe restaurant foods.  We Celiacs like to be pampered a bit, just like "regular" people.  Do you have any idea what it's like to go to a restaurant and watch everyone else partake in aromatic fresh, warm bread dripping with butter while you look at a menu full of masterpiece gourmet culinary delights only to discover that you can only eat salad greens with  no dressing?  The icing on the cake is when the server pops over to our table after we finish eating and asks, "And what can I get you for dessert?"  Auggghhhhhh!  Back to my original point:  No, I am not glad to have Celiac.  Goodness!
        3. Lie - I cook gluten-food for my family.  Nope.  The first thing that I did, if my memory serves me, when I was diagnosed was clean out my pantry.  My next door neighbors must have thought I was goofier than they thought.  I kept taking them flour, spices, canned food and box-mixes for a week until I was sure that gluten was totally removed.  I was a cleaning-diva, too, making my best effort to remove any traces of microscopic crumbs.  I gave my beloved Tupperware and my non-stick pots and pans to Goodwill and bought some glass food containers and new cookware.  My rule:  I want to live a very long time, so at our house I cook exclusive food.  That means gluten-free.  It was a hoot at first, because I didn't really know what I was doing, and the food tasted horrible.  Now, after years of gluten-free cooking classes and buddy-recipe-study (thank you, Internet!), my husband and daughter are happy to eat gluten-free dinners at home.  I still make them sandwiches on the weekends, and they can bring home glutenous take-out if they're having cravings, but I prepare foods that I can eat.  (Is there really someone out there who prepares two separate meals every night?  Good grief!)
        4. Truth - I know where the restroom is located in just about every establishment I visit.  It is a necessity!!!  We all have our little quirks.  Well, that is mine!

        Saturday, March 12, 2011

        Gina's Gluten Free Biscuits

        My husband made a comment not too long ago that surprised me.  I'd just found this recipe, and I was super excited to give it a try, when my dh said, "I think that you're glad you're Celiac."  No!  No!  No!  That wasn't it, but I can see how he got that impression.  There are SO many delicious recipes and Celiac friends out there, that when you connect with a really good one, it makes you smile.  


        There was a period of time when I mourned delicious food.  Not doughnuts or pizza or soft bread - just really tasty food.  Then I began discovering blogs and recipes.  That led to new friends and conversations.  I follow a good number of blogs, but the first one I followed was Gina Gluten Free.  Gina really knows how to cook!  I borrowed and adapted the ideas for this recipe from Gina.

        1 t. white vinegar 
        ¼  cup canola oil
        1 1/2 cups warm water
        3 large eggs 
        2 cups of white or brown rice flour
        ½  cup potato starch 
        ¼  cup tapioca flour
        ½  cup corn starch
        ¼ cup flax meal
        1 T. xanthan gum
        3 T. sugar or honey
        1 t. salt 
        2/3 cup skim milk powder
        2 1/2 t. dry active yeast for your breadmaker
        1. Preheat the oven to 350 degrees F.
        2. Combine the liquid ingredients in a small mixing bowl, and pour carefully into bread machine baking pan. In another bowl, mix together the dry ingredients (except xanthan gum) and add to baking pan. Place the baking pan in the bread maker. Select the normal/basic/white cycle and start the bread machine. After the mixing cycle begins, slowly add the xanthan gum.  
        3. Allow the dough to rise in the bread machine.  After the dough has risen in the bread machine, remove it and form into small rolls in greased muffin tins.   
        4. Allow the dough to rise in the muffin tins a second time.  Bake for 30 minutes.